Kim-Joy’s fat cat pizza recipe
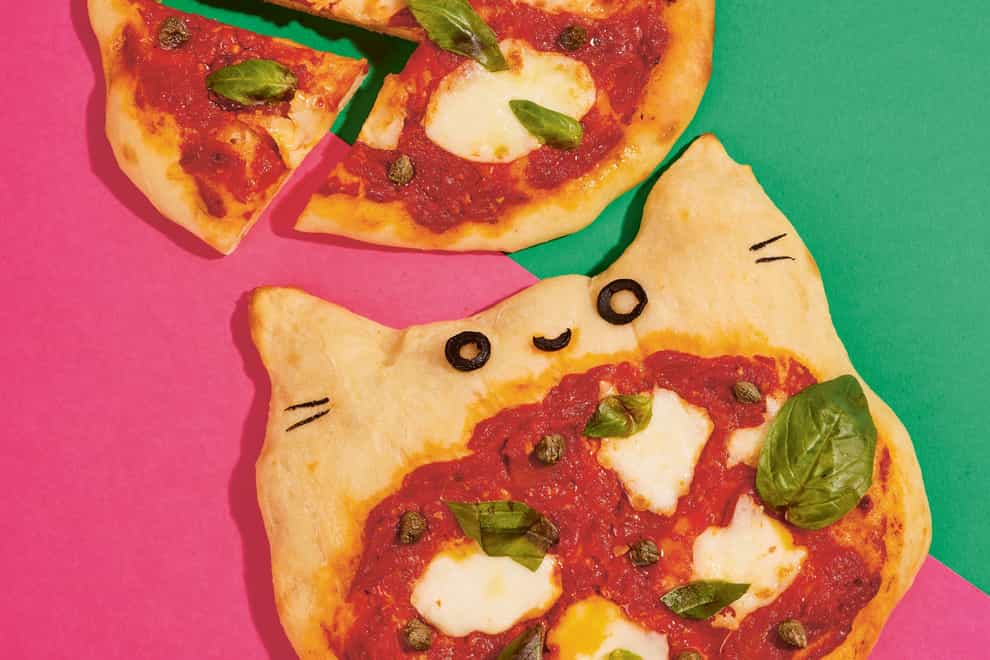
“The cutest and chonkiest fat cat in its spiritual food form”, is how former Bake Off star Kim-Joy describes these pizzas – for the uninitiated, ‘chonky’ refers to animals that are delightfully pudgy.
“Get all your friends and family involved in decorating their own with their favourite toppings, then just enjoy the beauty of wholesome homemade (cat) pizzas!”
Fat cat pizzas
Ingredients:(Makes 3 small pizzas)
For the dough:400g strong white flour, plus extra for dusting2tsp salt7g instant fast-action dried yeast280ml water (use tepid water to speed up the rise if you’re in a rush, but this isn’t necessary)20ml olive oil, plus extra for oilingSemolina flour for underneath the pizza (optional, but gives extra crunch)
For the toppings:Around 10tbsp tomato sauce for pizza (see below)1tbsp capers200g mozzarella (drained weight)A couple of black olives, for the cat faceBlack gel food dye, mixed with a tiny amount of water, for painting cat whiskersHandful of fresh basilSalt and freshly ground black pepperExtra olive oil, for drizzling
For the tomato sauce:2tbsp olive oil2 cloves of garlic, finely chopped2tbsp concentrated tomato purée1 x 400g can chopped tomatoesItalian seasoning, to tasteSalt and pepper
Method:
1. To make the tomato sauce, place a saucepan over a medium heat, then add the olive oil and garlic. Fry for 20-30 seconds until lightly golden (but not brown). Add the tomato purée and fry for 30 seconds. Add the chopped tomatoes and a couple of pinches of Italian seasoning then simmer over a medium heat, stirring occasionally. After five to 10 minutes, the sauce should have reduced down and thickened. Season with salt and pepper to taste. Transfer to a bowl, cover with plastic wrap and chill in the fridge until ready to use.
2. To make the dough, place the flour, salt and yeast together in a stand mixer fitted with a dough hook attachment (you can also use a bread machine just to knead). Make sure that the salt is not directly touching the yeast. Stir together, then pour in the water and olive oil.
Tip: If you don’t have a machine for mixing the dough, or you have the time and want improved flavour and no need to knead, then simply mix all the ingredients together in a large bowl, cover with plastic wrap and leave the dough to rise overnight in the fridge until doubled in size. The second rise after shaping will take a little longer, as the dough will still be cold from the fridge, but remember that the colder and slower the rise, the better the final fat cat pizza will be!
3. Place the dough in a lightly oiled large bowl, cover with oiled plastic wrap and leave to rise for about one hour or so (this depends on the ambient temperature – if the room is warmer, it will rise faster), or until doubled in size.
4. Meanwhile, prepare the toppings for your pizza. At least 30 minutes before the dough is ready, preheat your oven to its maximum temperature to start preheating a baking steel, stone or simply a standard flat baking sheet (ideally one without a lip, for ease). Doing so will give your pizza a crispier base.
5. When the dough has risen, set aside a little for the ears, then divide the remaining dough into three equal pieces, placing each piece onto an individual sheet of baking paper (scatter semolina on the paper first, if you like, to add extra crunch). Use the heel of your hand to press each piece into a rough circle, then stretch the dough with your hand to thin it out, making the edges thicker than the middle. Use the reserved dough to add ears, pressing them very well to make sure they stick on.
6. Add your toppings to the dough, leaving space at the top for the cat face. Add sliced black olives for the eyes and mouth.
7. Leave the pizzas to prove at room temperature for about 20 minutes, or until puffed up slightly. They shouldn’t increase much in size. If you did an overnight first rise, then just wait for the dough to come to room temperature (up to two hours) before you bake it.
8. Once risen, slide any flat tray (or even a piece of stiff cardboard) under one of the pizzas – this should be easy to do, as the pizza should be on a sheet of baking paper. Slide the pizza along with the baking paper onto the preheated stone, steel or baking sheet that’s in the oven. If you’re not using a heated tray, simply place the tray of pizza in the oven as normal.
9. Bake one pizza at a time, for around five to 12 minutes each. The hotter your oven and the hotter the baking stone or steel, the quicker they will bake!
10. Once cooked, quickly paint the whiskers using black food dye mixed with a tiny amount of water and a paintbrush, then season with pepper, scatter with fresh basil (depending on your chosen toppings) and drizzle with extra olive oil. Serve straight away.
Bake Me A Cat by Kim-Joy is published by Quadrille on 16 March, priced £16.99. Photography by Ellis Parrinder.
The best videos delivered daily
Watch the stories that matter, right from your inbox